5 Fun and Adorable Christmas Crafts to Do with Kids
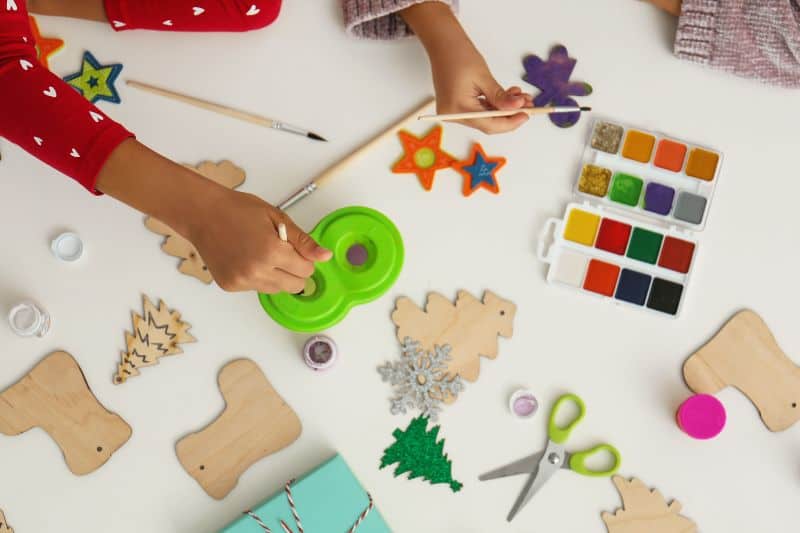
Nothing is more delightful than the excitement kids have for Christmas. Capture that excitement by involving the kids in creating the Christmas decor for the Holiday Season. Some of the Christmas crafts you make will pass the test of time. I know, because I’m still hanging the Reindeer Broom that my son made 25 years ago! While there are plenty of gift ideas for kids in Orlando, these crafts make great gifts for others.

For each project, you’ll need a few supplies. All of them can be found at Michaels, Hobby Lobby or Joanne’s. Some are available at the Dollar Store or Amazon.
As you’re doing these projects, remember they will capture your child in a moment in time. Don’t try to make it perfect. Help them when they need the help. For younger kids, if you opt for a glue gun instead of a glue stick, you may want to do that part so they don’t burn their fingers with the hot glue.
Once you’ve enjoyed making these crafts together, make time to visit some of the many dazzling Christmas lights and holiday decorations in Orlando. Plus there are plenty of free holiday events this year too!
Christmas Crafts to Do with Kids
1. COUNTDOWN TO CHRISTMAS
The Countdown to Christmas display is one of my favorites to make because it can be made with kids of any age. It can be simplified or amplified, depending on who is creating it.
Supplies:
- 2 craft wood blocks approximately 8” x 3” x 1”
- 2 square craft wood blocks 2.5” x 2.5” or smaller
- Paint (suggest red, green, white but all colors are acceptable)
- Paintbrush
Enhancements/Alternatives:
- Christmas stickers
- Paint pens
- Material (burlap, felt, Christmas plaid, etc)
- Glue gun or glue stick (if using material)
The two larger blocks will serve as the stand for the cubes/blocks which will have the numbers on them.
With the younger children, have them paint the wooden blocks. Perhaps one big block red, one big block green and paint the smaller two blocks white.
The kids can write the numbers on the blocks with paint pens or use number stickers. Don’t worry if they aren’t straight. The important thing is to include these numbers on the blocks so that you can create any number of days until Christmas:
- On one block: 1, 2, 3, 4, 5 and 6
- On the other block: 1, 2, 7, 8, 9 and 0.
Depending on their age, the kids can also write “Days ‘til Christmas” on the sides of the larger block or you can write it with the paint pens.
Another option is to paint the number blocks with chalkboard paint. Instead of putting permanent numbers on the blocks, the kids can write the days until Christmas each day.
With older kids, consider covering the larger blocks with burlap for a natural look or a Christmas plaid for a more traditional look. Simply lay the block in the center of a piece of material and glue the edges of the material over the sides and onto the block. Once dry, turn it over so the clean side is facing up.
For artistic children, invite them to draw designs on either side of the words or put snowflake stickers on it to enhance the look.
Amplify the design by gluing small nutcrackers, santas or deer to the top board; either on each side of where the number blocks sit or place the number blocks on one end and the nutcrackers and santas on the other end.
You’re only limited by your (and your kids’) imagination. My son chose to add “Christmas dinosaurs” next to the numbers!
2. GNOME CHRISTMAS ORNAMENT
Gnomes are all the rage these days. Kids love them. Adults loves them. These make fun gifts for kids to give their friends too.
Younger kids may need some help cutting the yarn or using the glue/glue gun properly.
Supplies:
- Wood or terra cotta planter; approximately 1.5 – 2”
- Yarn (approximately 30 feet….the fluffier/thicker the yarn the less you need.)
- 4” tall piece of cardboard
- 12” ribbon or twine for the “hanger”
- 14mm wooden or rubber ball for the nose
- 12mm wooden or rubber bead for the top of the hat
- Glue gun or glue
- Scissors
- Threader/Needle (optional but helpful.- how to make your own is at the bottom of these instructions)
- Wrap the yarn around the 4” tall piece of cardboard approximately 50 times. This will become the beard.
- Cut the yarn from the skein (not the cardboard yet. Just cut the yarn where it is still attached to the skein of yarn.)
- Thread the ribbon or twine under the yarn on one side of the cardboard and pull both sides of the ribbon to the top of the cardboard.
- While holding the ribbon around the top of the yarn, cut the yarn at the bottom of the 4” piece of cardboard and discard the cardboard.
- Thread the ribbon ends through the drain hole of the pot from the inside out pulling the yarn into the pot.
- Now thread the ribbon through the bead so that the bead sits firmly over the drain hole.
- When you have the yarn filling the pot and the top of the “hat” firmly on top of the pot, add a dot of glue to the outside of the drain hole and the ribbon and reset the bead to secure all the elements in place.
- Place a dot of glue on the wood or rubber ball and place it on the yarn where the yarn meets the pot. Hold it in place until it dries. Tie the ribbon ends to enable hanging on the tree.
- The final step is grooming the beard. You can cut it shorter, you can “comb” it out and make it flufflier (depending on the type of yarn you used), you can add a rubber band to the bottom of the beard.
If you’d like to enhance your gnome, consider decorating the hat by painting a design on it, tying rafia around it, glueing gems around the rim, monogram it.
This Christmas craft is so cute that kids may not want to put them away after Christmas.
HOW TO MAKE YOUR OWN THREADER: Take a piece of 20-24 gauge wire and cut it twice as long as the pot you’ll be threading through. Fold the wire in half. That’s it! Yep. But instead of threading the ribbon through a needle hole, you’ll fold the ribbon ends over the “v” of wire fold and hold the two sides of the wire together, thread the wires together and pull the ribbon through the hole. Remove the threader.
3. TABLETOP CHRISTMAS TREES [MADE FROM CUPCAKE LINERS]
These are so cute, so easy, and oh so fun.
Supplies:
- 12×12 Cardstock or you can buy a foam cone
- Christmas Designed Cupcake Liners
- Small piece aluminum foil
- Scotch tape or glue
- Cut your 12 x 12 cardstock in half diagonally resulting in two triangles.
- Fold your triangles into cones and tape the ends so the cones hold their shape.
- Trim the bottom so that it can stand up straight on a flat surface. (Make it as tall or as short as you like.)
Set your cones aside and gather your cupcake liners.
- Cut the centers out of your cupcake liners.
- Set them aside. You will be using the ribbed sides of the liners.
Bring one of your cones back in front of you.
- Tape a ribbed liner around the cone, starting at the bottom. Don’t worry if it doesn’t go all the way around.
- Grab another liner and skirt it around the rest of the way. Tape it down.
- Continue adding layers of liner skirts until you get NEAR the top.
- Before you add the final skirts, cover the tip of the tree with some aluminum foil. This will give the top of the tree a sparkle. Tape down the foil so that it doesn’t slide around. Don’t worry what it looks like on the sides where you fold it on top of itself. That part will be covered with the rest of the skirts.
- Finally, add the remaining skirts until you get as near to the top as you wish.
Older kids may want to make a star out of the aluminum foil and add it to the top of the tree.
4. REINDEER BROOM
The first time I ever saw a reindeer broom was when my son made one in elementary school. It is so darling that it continues to hang in our home every Christmas,
Supplies:
- Cinnamon Broom (Home Depot carries them and I saw them at the grocery store yesterday)
- Pipe Cleaners
- Red pom pom ball for nose
- Large googly eyes
- Red ribbon
- Green ribbon
- Floral or craft wire
- Scissors
- Glue
- Split the brush section of the broom in half lengthwise and tie each side with a pipe cleaner.
- Using the green ribbon, tie bows around each side, over the pipe cleaners.
- Glue on the googly eyes and the red pom pom nose.
- Glue the end of the red ribbon at a 60° angle on the back of the reindeer. (If it was a clock 60°would be at about 2 o’clock.)
- Wrap the ribbon at an angle around the broom handle until you reach the end of the broom. Glue the end of the ribbon to the back of end of the broom. As you wrap the ribbon, leave gaps so that the broom shows through.
Now its time to make the hanger.
- Take a piece of floral wire that’s long enough for your hanger size.
- Wrap the wire around the base of your cinnamon broom, just under the pine bough (the leafy part).
Pull the wire tight and twist it to secure it in place. Make sure the twisted section is tight and close to the broom to prevent slipping. - Shape the remaining wire into a loop to hang your Reindeer Broom on a door or wall.
- Twist the wire tightly and keep the loop smaller. This gives you a more secure hanger so it doesn’t slip out of shape.
5. CANDY CANE WREATH
The most difficult part of this project is stopping the kids (or yourself) from eating the candy canes!
Supplies:
- 16 Candy Canes (size depends on whether you choose real candy or plastic canes. I used 6” plastic candy canes that I bought on Amazon.)
- Glue (type of glue depends on whether you use real candy canes or plastic. Check the glue you select to be sure it will bond what you are working with. For the plastic candy canes, I used craft glue.)
- Large Medallion for center (I used snowflake theme)
- Small Medallions (I also used smaller snowflakes here)
- Ribbon for hanging
- Clear glaze* (you will need this if you opt to use real candy canes for this project. You will not need the glaze if you choose plastic candy canes.)
- Foam squares* If you would prefer something other than snowflakes, think about what you can cut out of foam squares. One idea is cutting Christmas trees out of green foam.
If you use real candy canes, start here
- Unwrap the candy canes and lay them flat on a surface like a piece of cardboard.
- Spray them with a light coat of acrylic.
- Let them dry overnight.
- Flip them over and spray the other side.
- Let them dry overnight.
If you use plastic candy canes or have finished the instructions above for real candy canes, begin here
- Lay out your wreath by placing the candy canes so that the bottoms of the canes touch each other in the middle and the top of the hooks touch each other at the top of the cane in a wreath-like design.
- Glue your wreath together.
- Apply glue at each touch point of the candy canes. Because glue may drip between the candy canes, apply 2-3 light layers of glue; one at a time.
- Be careful that you don’t glue the canes to the surface you’re working on.
- Glue the large medallion (snowflake or Christmas tree or whatever you decide) onto the middle of the wreath, where the ends of the candy canes come together. Not only does this give it a more “finished” look, but it can also cover up any globs of glue that may have formed there.
- Glue the small snowflakes/Christmas trees where two candy canes come together to create the heart shape.
Let everything dry completely.
Add a hanger
Any ribbon or twine will do. I chose a red and white striped ribbon to match the candy canes. Loop the ribbon around one of the candy cane hooks and thread the ribbon through itself. Tie a knot in the top at the height you want to hang on a door or a wall.